


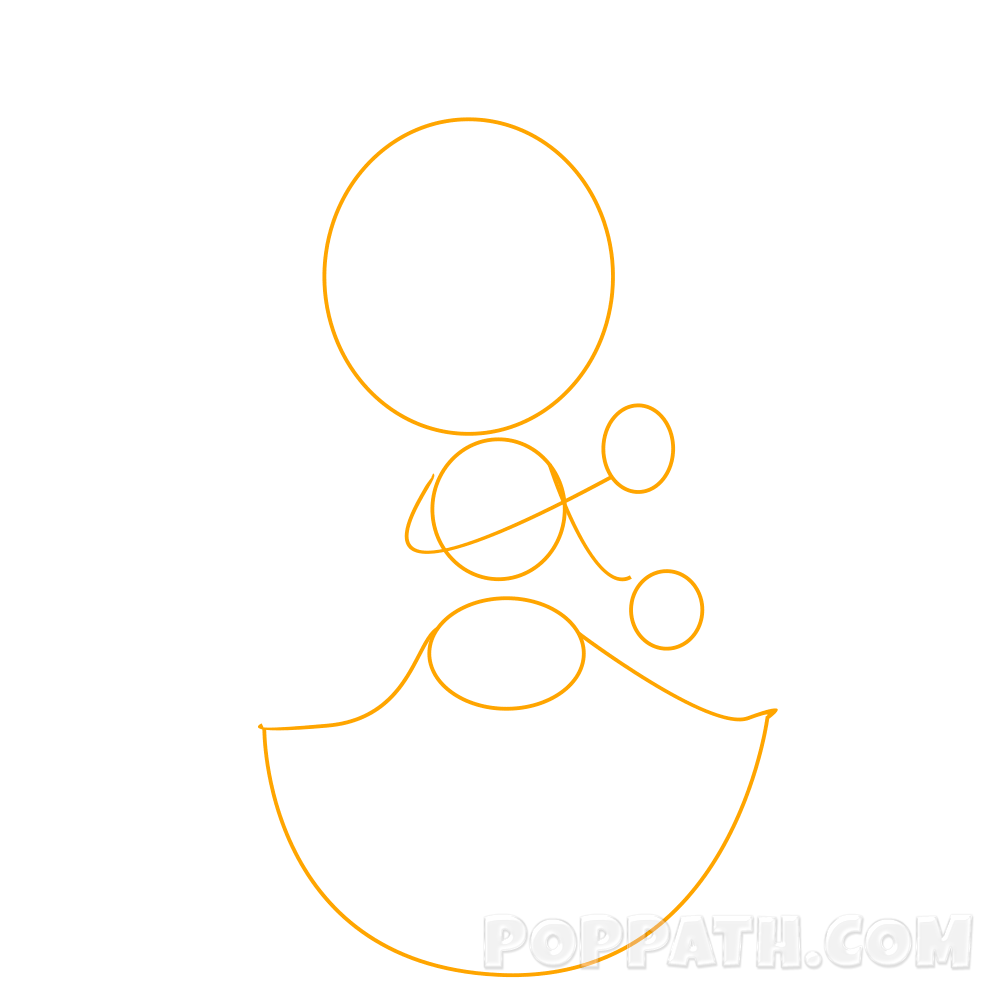
Step 1: We begin by drawing a circle (1), then below the circle, draw another smaller circle (2); from the left side of the smaller circle, make a curve line across the smaller circle, at the curve line end, draw another little circle (3), at the right of circle 2, make a line that will intersect but below the curve line of the left. Next, draw a sitting oval, then at the both side of the oval draw lines. Finally, draw a semi-circle with a meeting point with previous oval lines.
Step 2: Sketch out the Chibi Princess’ head. To do that, sketch out the hair in circle 1.
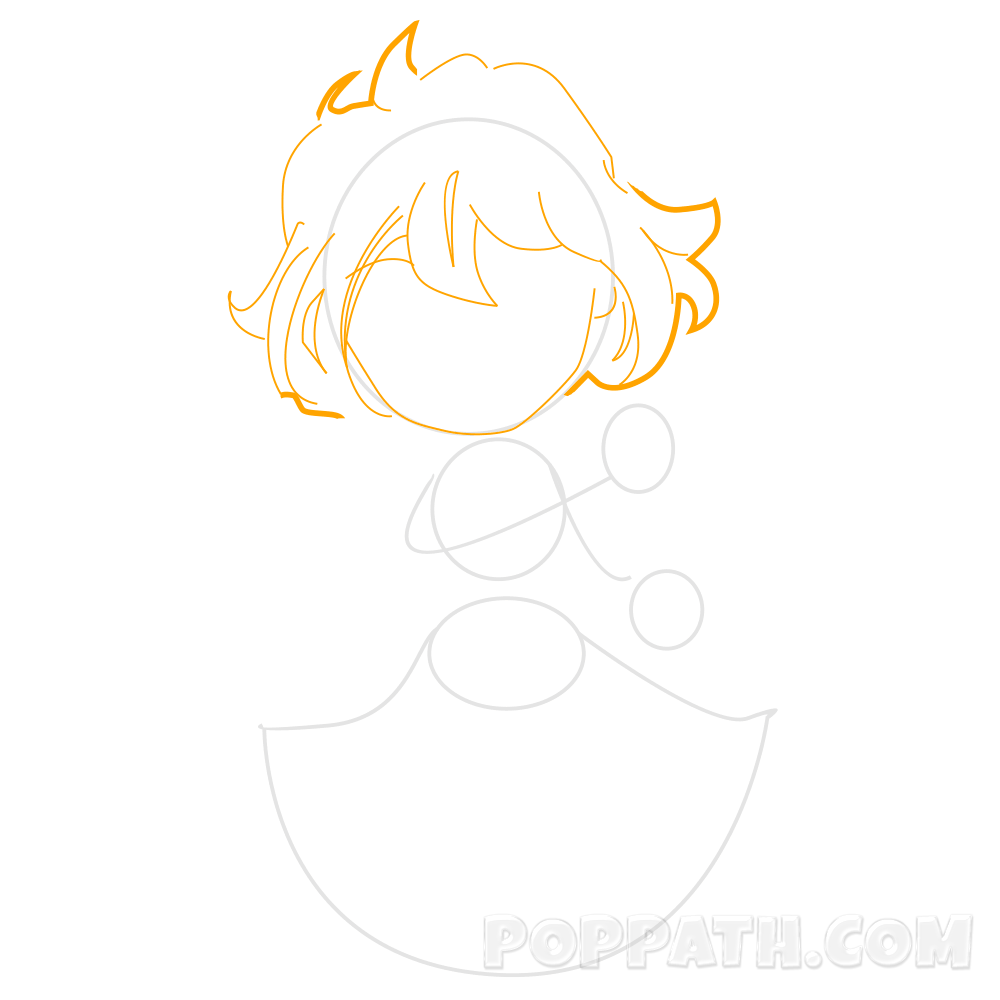
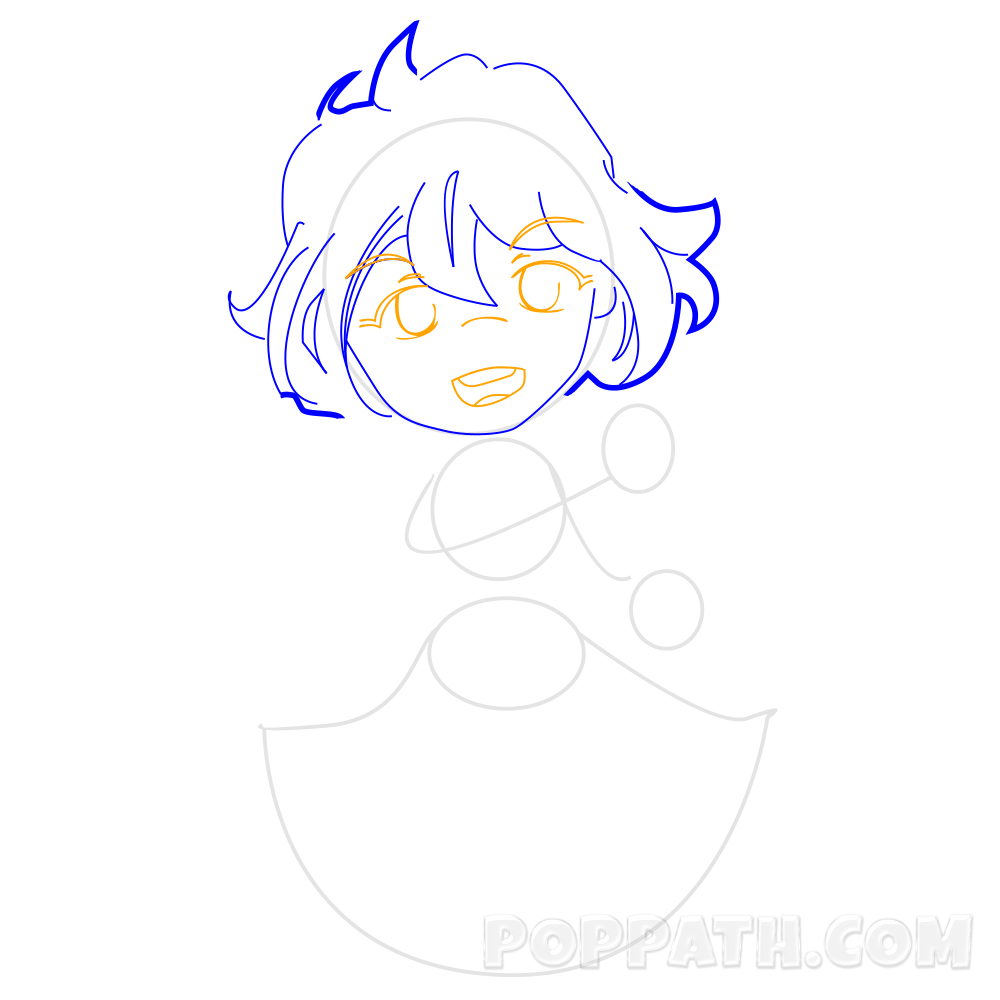
Step 3: Sketch out the eyes, nose and mouth inside the face circle. Note: Ensure that some hairs are covering the forehead.
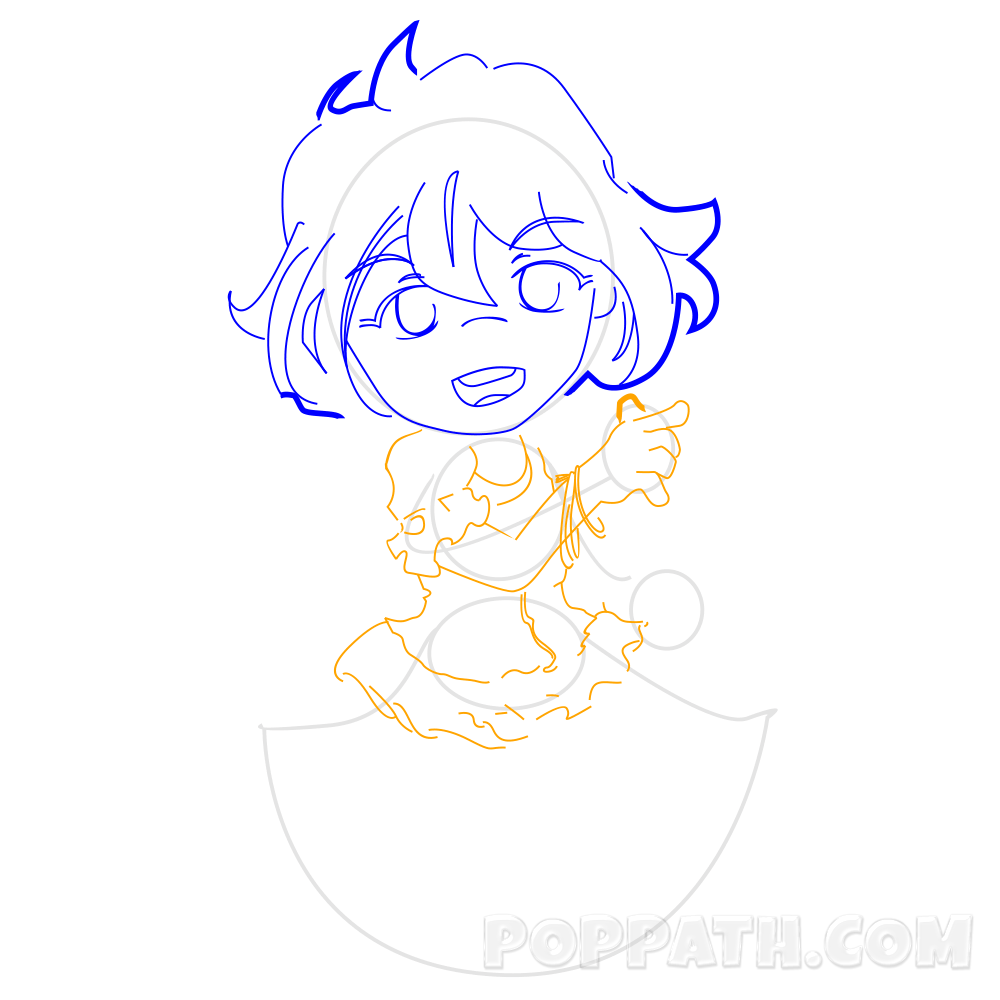
Step 4: Below the head, complete the chest with the drawing of her cloth and the right hand with a finger stretch
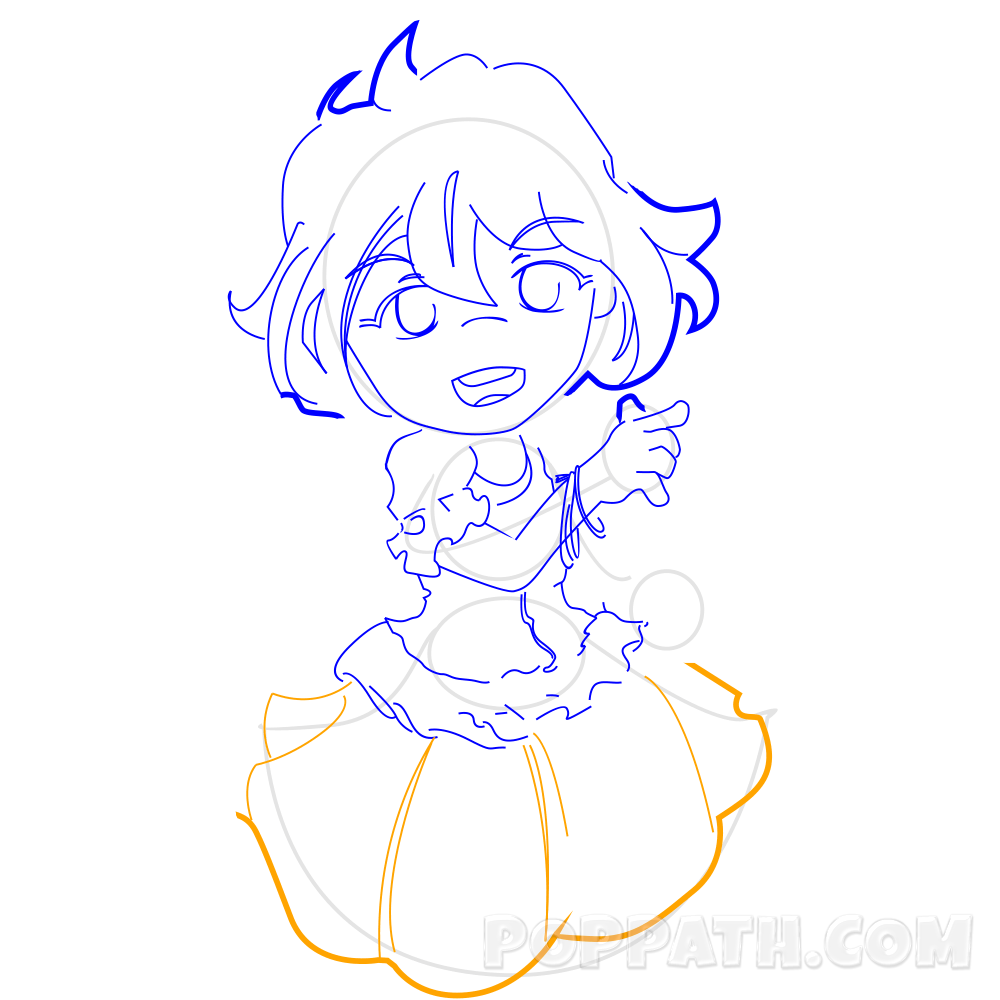
Step 5: Sketch out the skirt from the semi-circle drawn in stage 1.
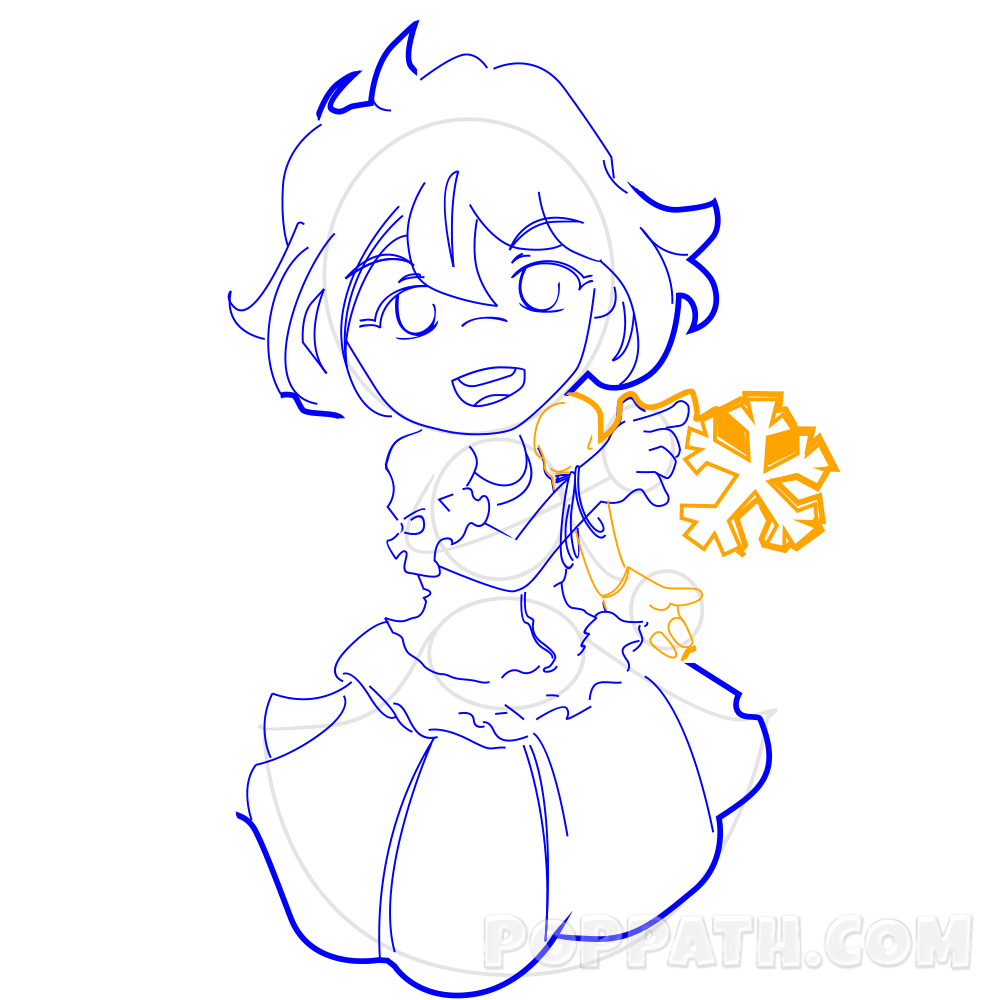
Step 6: Now sketch out the left hand and the flower.
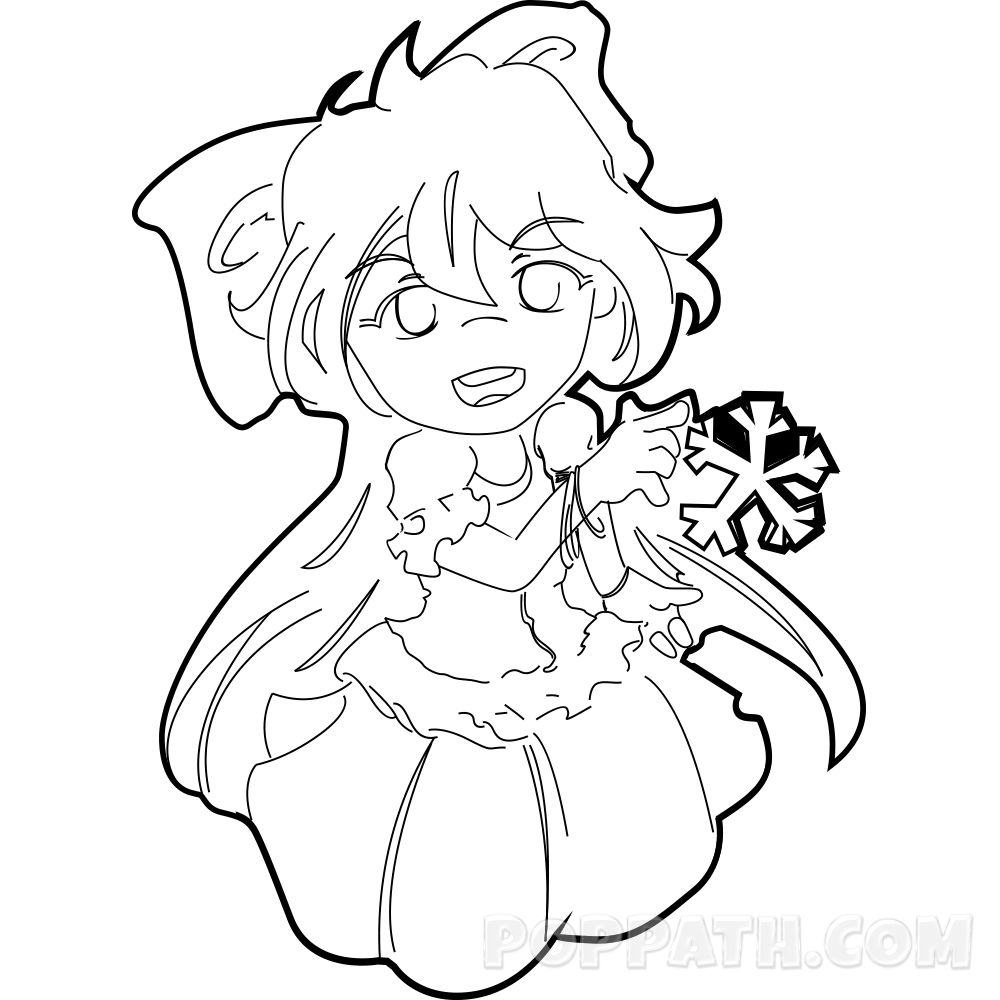
Step 7: Now sketch out the shadow around the drawing.
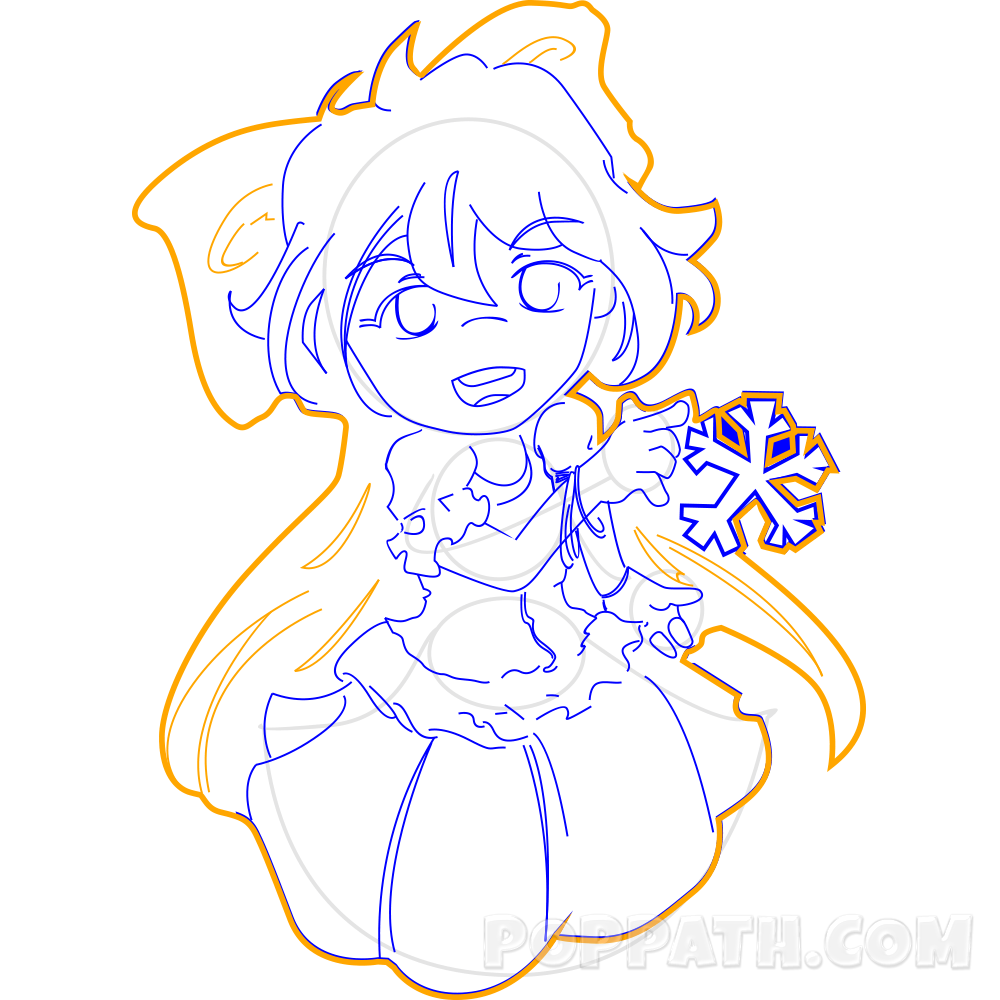
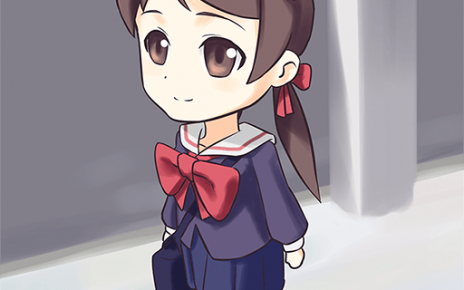
Step 8: Wow, completed! It is time to color Chibi Princess.