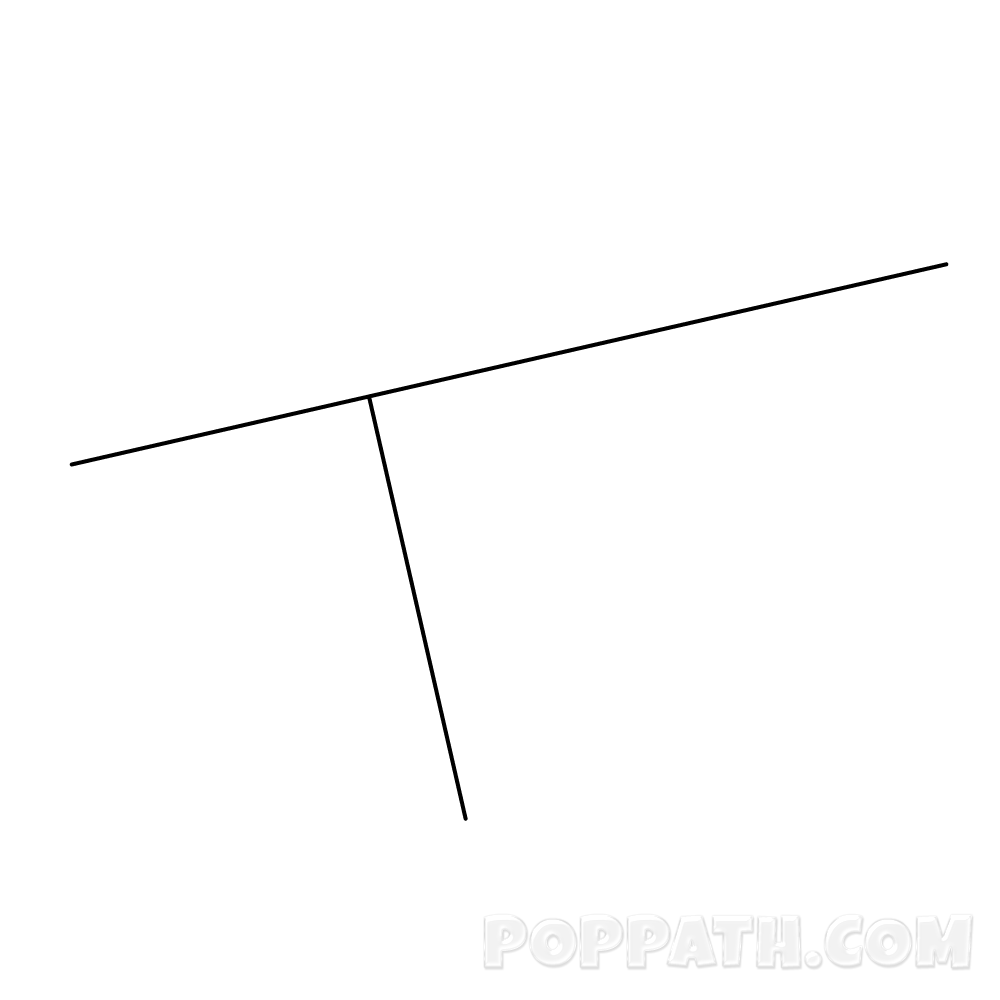
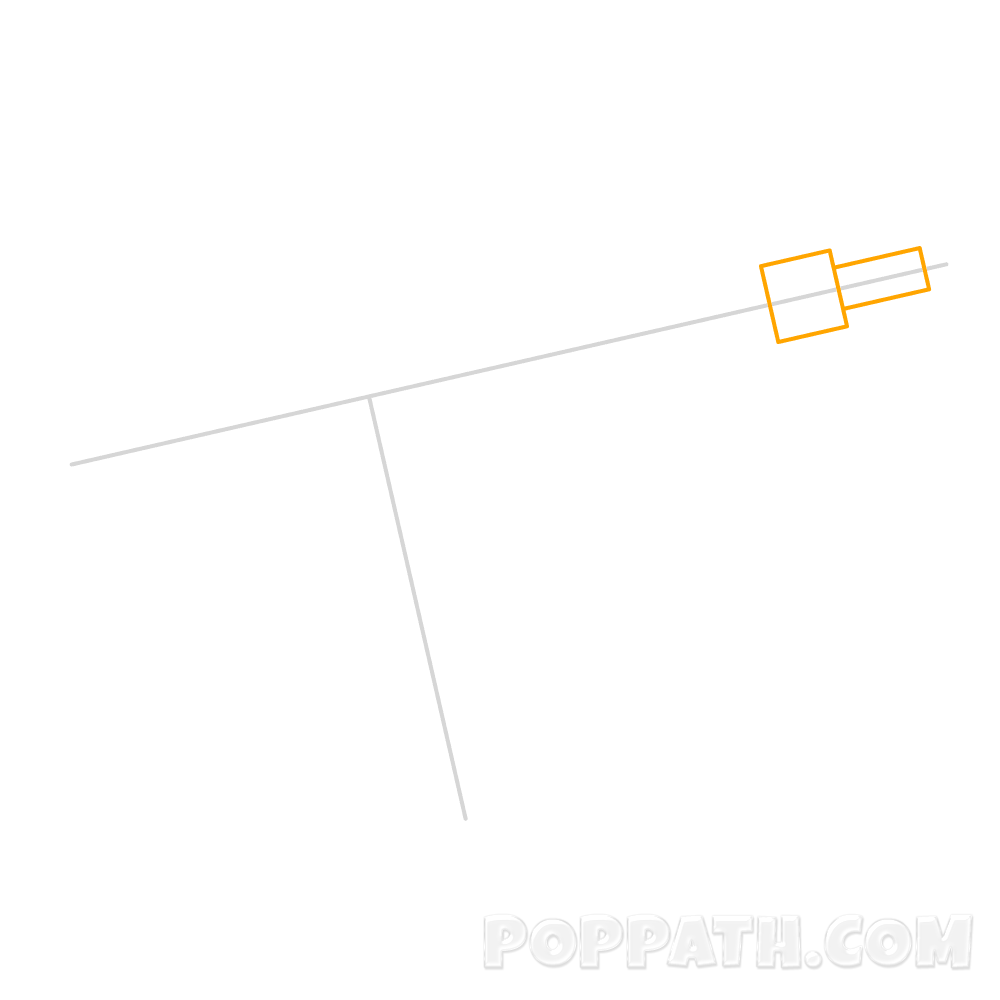
Step 1: Draw a slanted horizontal line, with a slanted vertical line 1 third of the way down.
Step 2: At the right most part of the horizontal line, add rectangle, then to the left of that add a square.
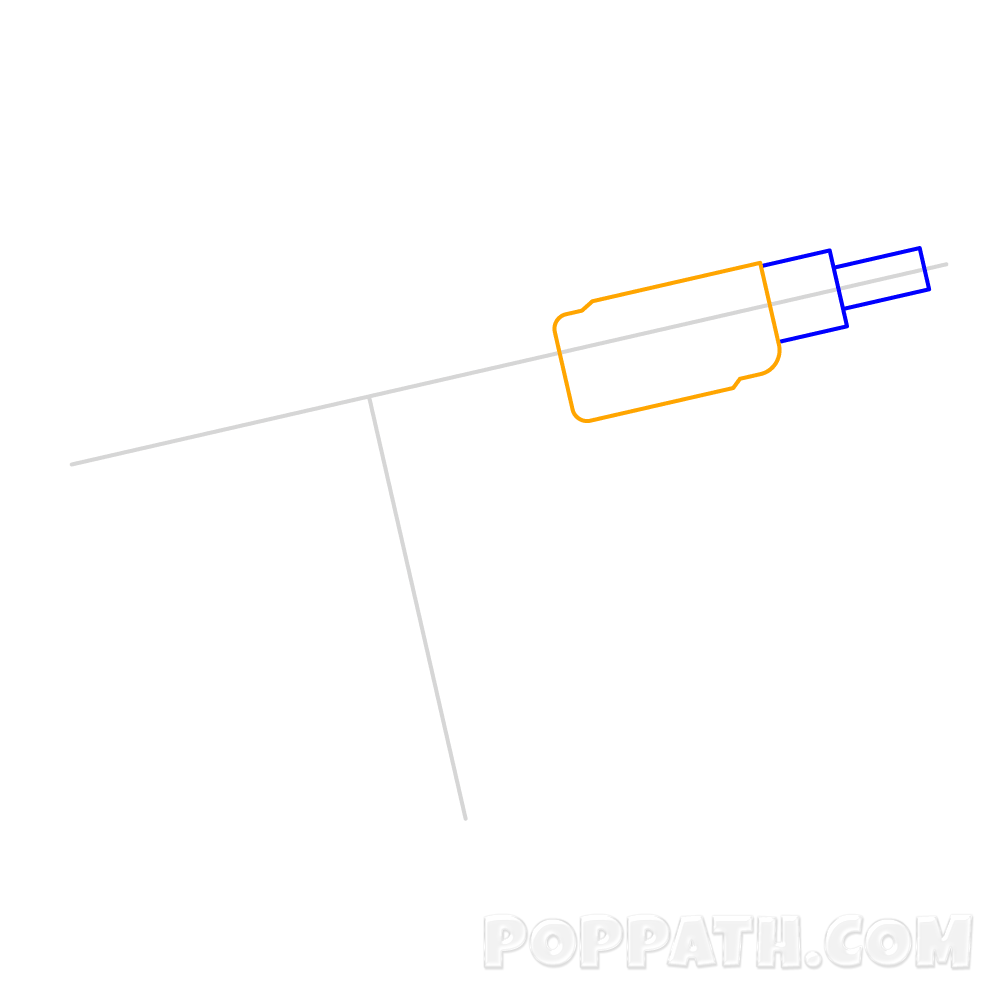
Step 3: Add another somewhat square-like box to the left of the previous square.
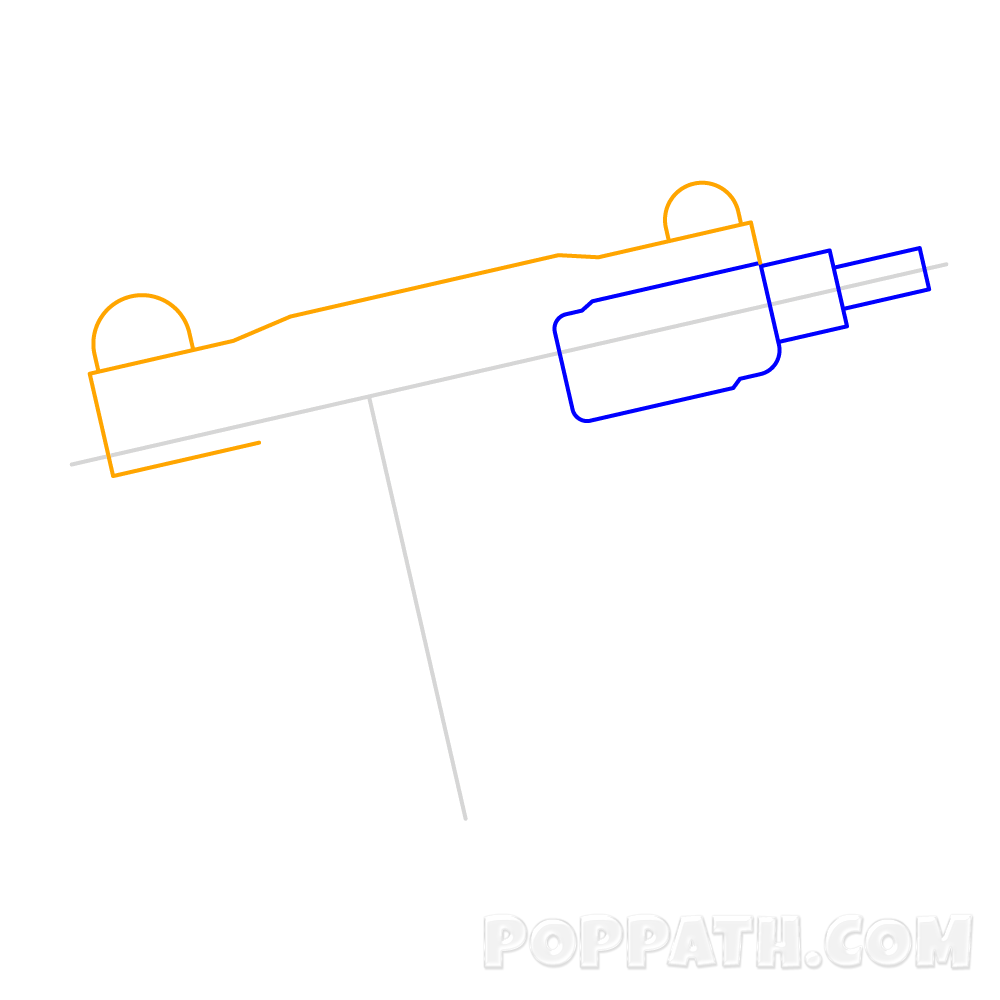
Step 4: Now we will sketch out the top portion of the uzi frame. Be sure to add semi circles to each side of this step.
Step 5: Complete the bottom portion to the top of the uzi by adding a slanted rectangle. Also add a side vertical rectangle to the left side. Also add small circles as shown.

Step 6: We will now begin to curve out the clip of the gun. Be sure to follow along the vertical guideline in step 1. Also add a small trigger near the clip.

Step 7: In this step we will be adding details to the rest of the gun; Add lines to the clip and action, then add various rectangles to the the top frame of the gun. Be sure to also add a trigger guard.

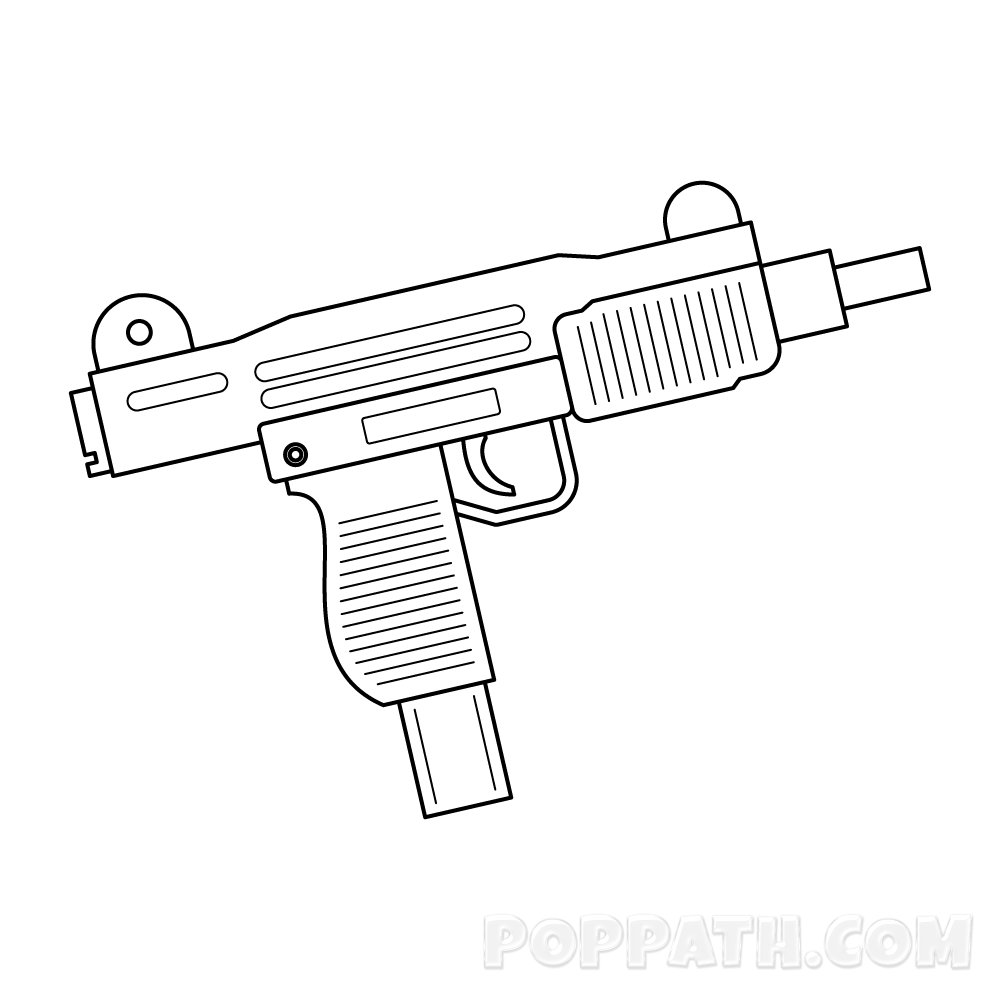
Step 8: Our uzi is complete and ready to be fired!