Zombies

How To Draw A Tiger Zombie

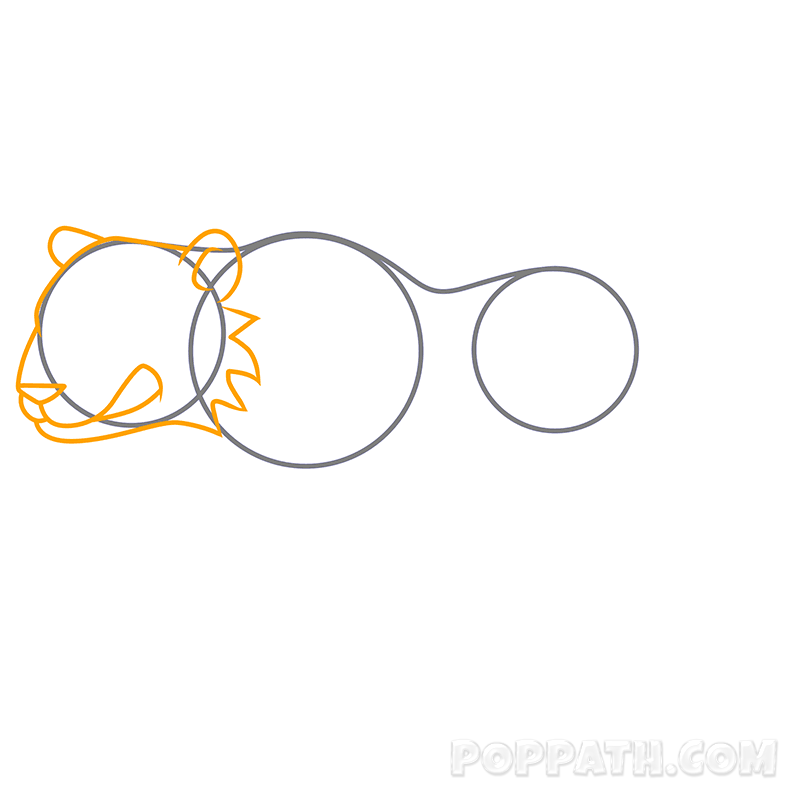
Step 1: Let’s begin by drawing three circles to make up the tiger’s head and body. Overlap circle 1 and 2. The middle circle is the largest. Now you can add guidelines for the tiger’s back by adding a loose line along the top connecting all three circles.
Step 2: Let’s add some personality to our tiger! Start by adding two half circles for the ears. Under the right ear begin to draw the jagged lines of the tiger’s mane. Next, draw a wide oval for the nose and mouth. Draw an upside down triangle for the nose. At the point of the triangle draw the mouth line.
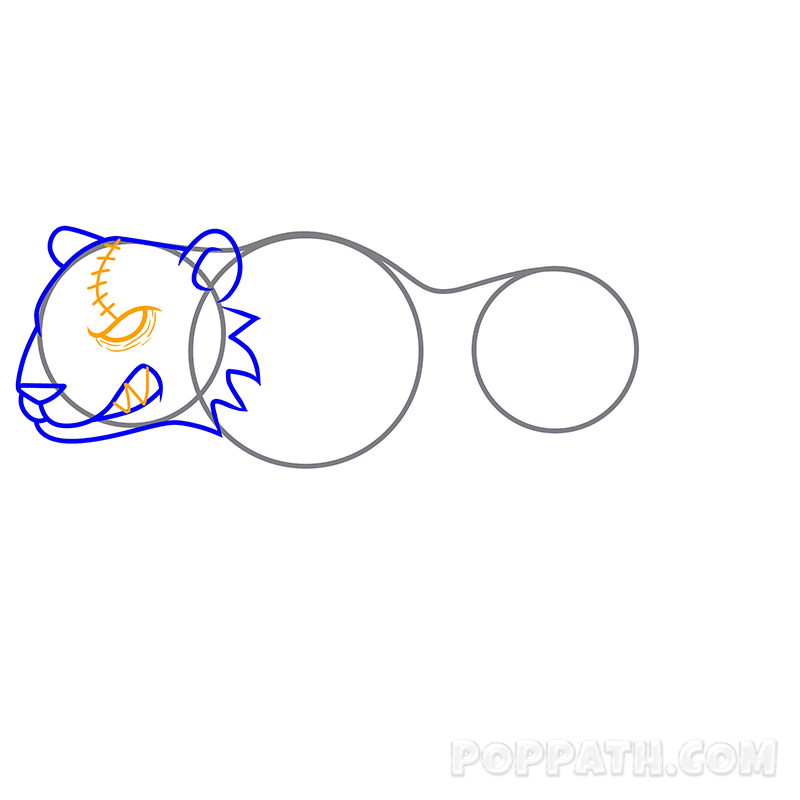
Step 3: In the space you just created for the mouth add, sharp, pointy lines for teeth. Next, let’s add the eye. Draw the lower line as a half circle. From there you can add a curved line at the top of the eye. Let’s add some creepy scar lines. Put your pencil in the middle of the upper line of the eye. From there, drag the line up toward the left ear. Then you can add the short horizontal “stich” lines. Last, add some detail below the eye. Use short lines underneath to make the tiger look like a zombie.
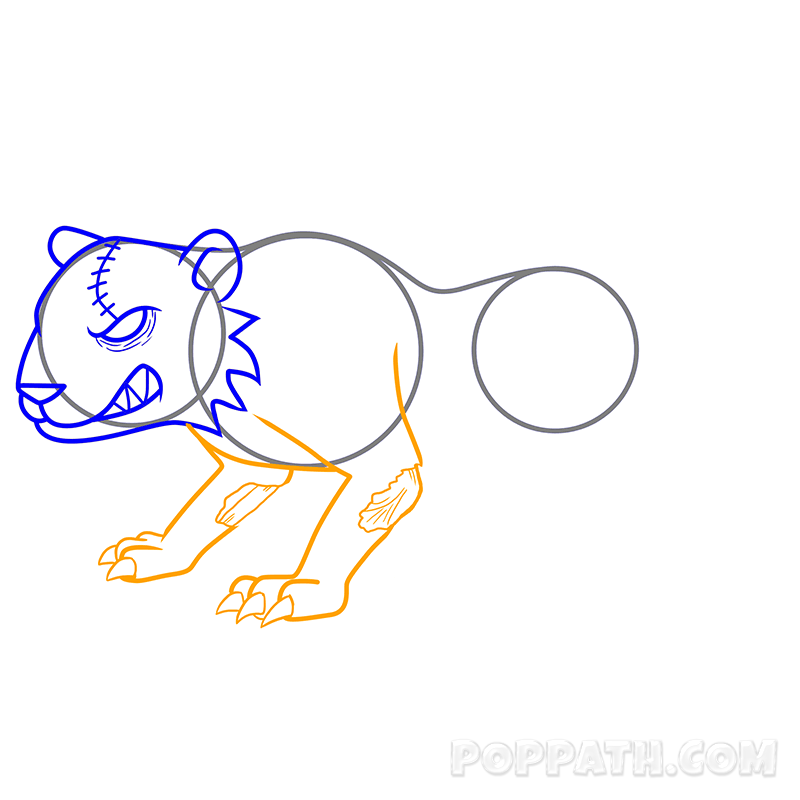
Step 4: Let’s add the 2 forelegs. The legs are drawn below the middle circle. Make sure you had the sharp claws to his paws and wounds or scars near his elbow on both legs.
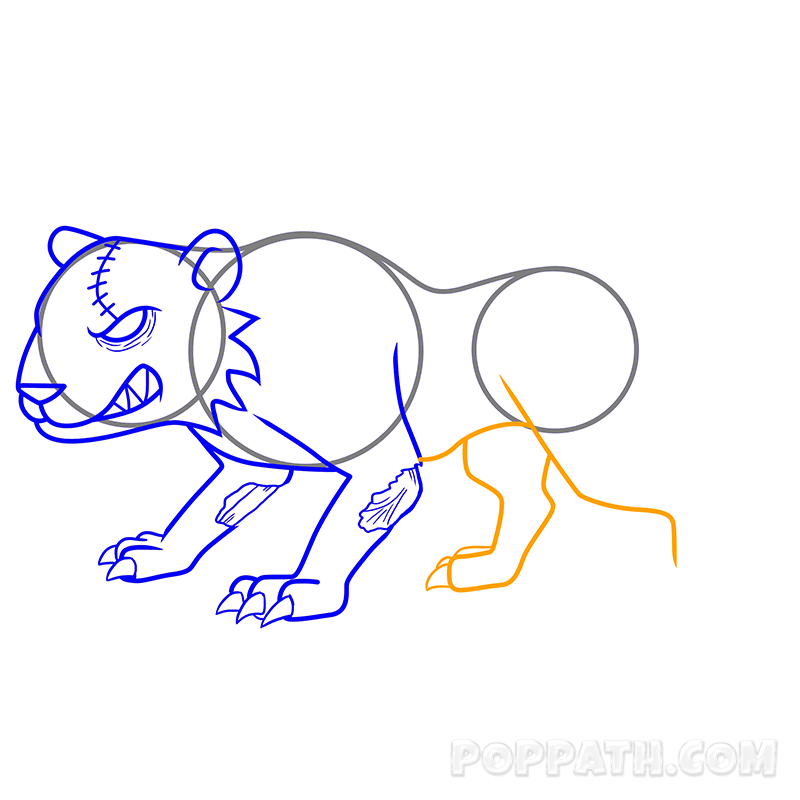
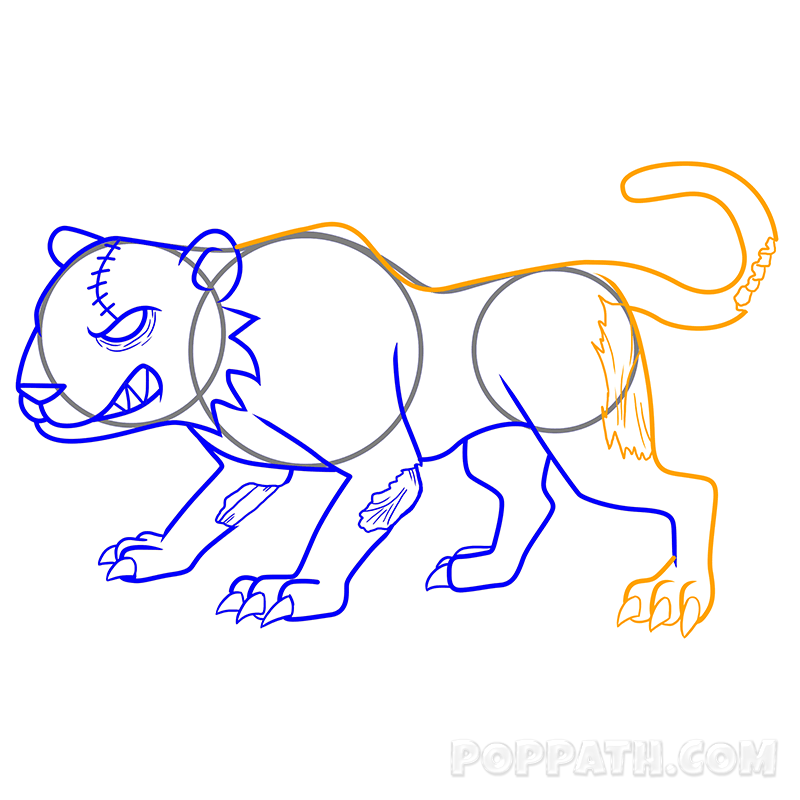
Step 5: Add the back leg. Draw from the middle of his stomach to the middle of the last circle. Add the side view of the claws. Start just the guideline of the fourth leg making it touch the other hind leg.
Step 6: Finish the back leg by adding a guideline from the side of the circle down to the paw. Add claws and zombie patches. From the top of the circle draw a C shape for the tail. Add a large scar to the tail.
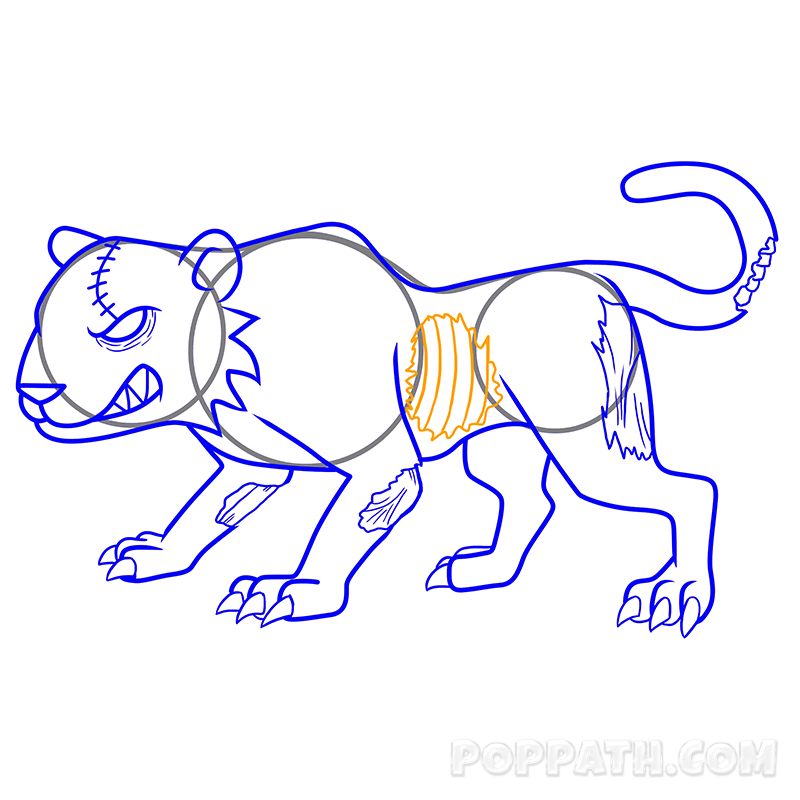
Step 7: Add more scars to the belly of the tiger. You can add curved lines for the ribs.
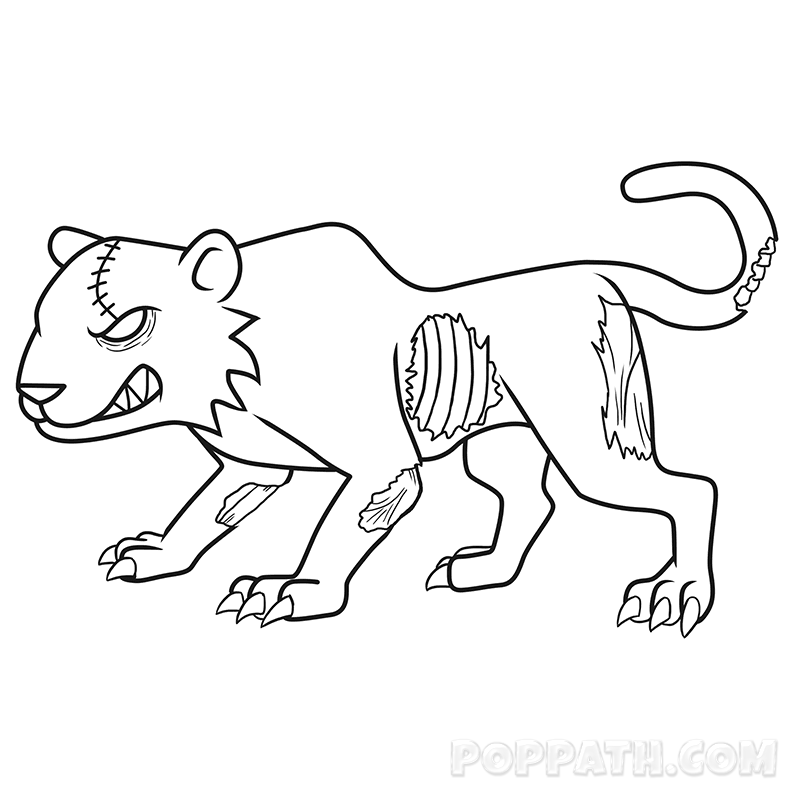
Step 8: Now erase your guidelines. Feel free to add more scars and wounds to your zombie tiger! Grrrrrr

Leave a Reply

Your email address will not be published. Required fields are marked *