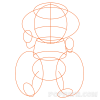
Step 1: In the first step, you have to draw a sketch. You will do this by drawing more regular circles as shown in the first step of the instructions. Take care of the shape of the circles. Although all the lines are regular, the circle of the head is turned horizontally while the leg circles are turned vertically. Also, be careful about the size of circuits in order to get full symmetry.


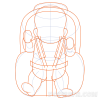
Step 2: Based on the sketch you made, try to link the lines to the shaped whole. When making the shape of the seat, make sure it has a padlock shape. When connecting the lines on your baby's body, draw a few lines that represent the belt.


Step 3: In the third step, draw details on the face, hands, and belt. When drawing a face, take care of the expression. Emphasize the baby's eyes and try to create an exciting expression on the face.


Step 4: Draw the tooth to the baby's face and then hair. Also, it is important to draw a few lines from the side that represent the interior of the baby's seat and which will later be painted brighter than the outer part.


Step 5: In the last step, connect all lines that are not connected and wipe those that are superfluous to you. Take care of colors and shading. Try to use the opposite colors to achieve a stronger effect. Ta-da! Now you have a picture of your baby that looks forward to driving and its challenges.


